Fool-proof Flowers to Grow Yourself
There is nothing better for the soul than to grow flowers from seed. Do you remember sprouting cress seeds from an egg shell when you were a child? That sense of wonder never leaves us. These seeds are even more exciting because they will produce plants that hang around for longer than cress, looking as fabulous in your garden as they will in a vase. You can get creative with designing your own colour-combinations, not to mention playing around with flower-forms, textures and scent. There is a whole world of sensory delight!
Five or six packets of seed, a couple of bags of compost and a few containers allow you to have flowers to cut for the house through summer and autumn, plus spare to give to family and friends. When the first frost arrives in autumn, you can hoik out all of these annuals (collecting seed for next year if you like) and replace the lot with bulbs for flowering next spring. Once the bulbs have finished flowering in late May, hoik them out, and replace them with your new batch of annuals. It’s like a more wholesome obsession with fashion, only cheaper.
I have selected the easiest varieties for you to try in pots. Or a window-box. Or a flowerbed or raised bed. In fact any recycled container will do, so long as it has a depth of about 50cm, and you have poked or drilled a few drainage holes in the bottom. I have successfully grown cut flowers in old wellies, a leaky old watering can, a car tyre and a packing crate.
These flowers are all annuals. This means that they grow really quickly, and produce a mass of flowers for you to cut every few days to put in a vase. Annuals are best sown from mid-March through to May, but don’t worry if you’ve missed this window. You can pick up plug plants in your local garden centre, or you can plant bulbs for next spring from September to December. If you’re reading this in January or February, just hold your horses until March. Read my blog, salivate over seed catalogues (my favourites are Chiltern Seeds and Higgeldy Garden), and lovingly stroke your seed packets until it is time to sow.
You don’t have to limit yourself to my selection of flowers. These are merely a hint to get you started. One of my favourite daydreamy activities is to think of lovely combinations of flowers to grow together. I have gone for two different colour schemes, but you can swap varieties as you please.
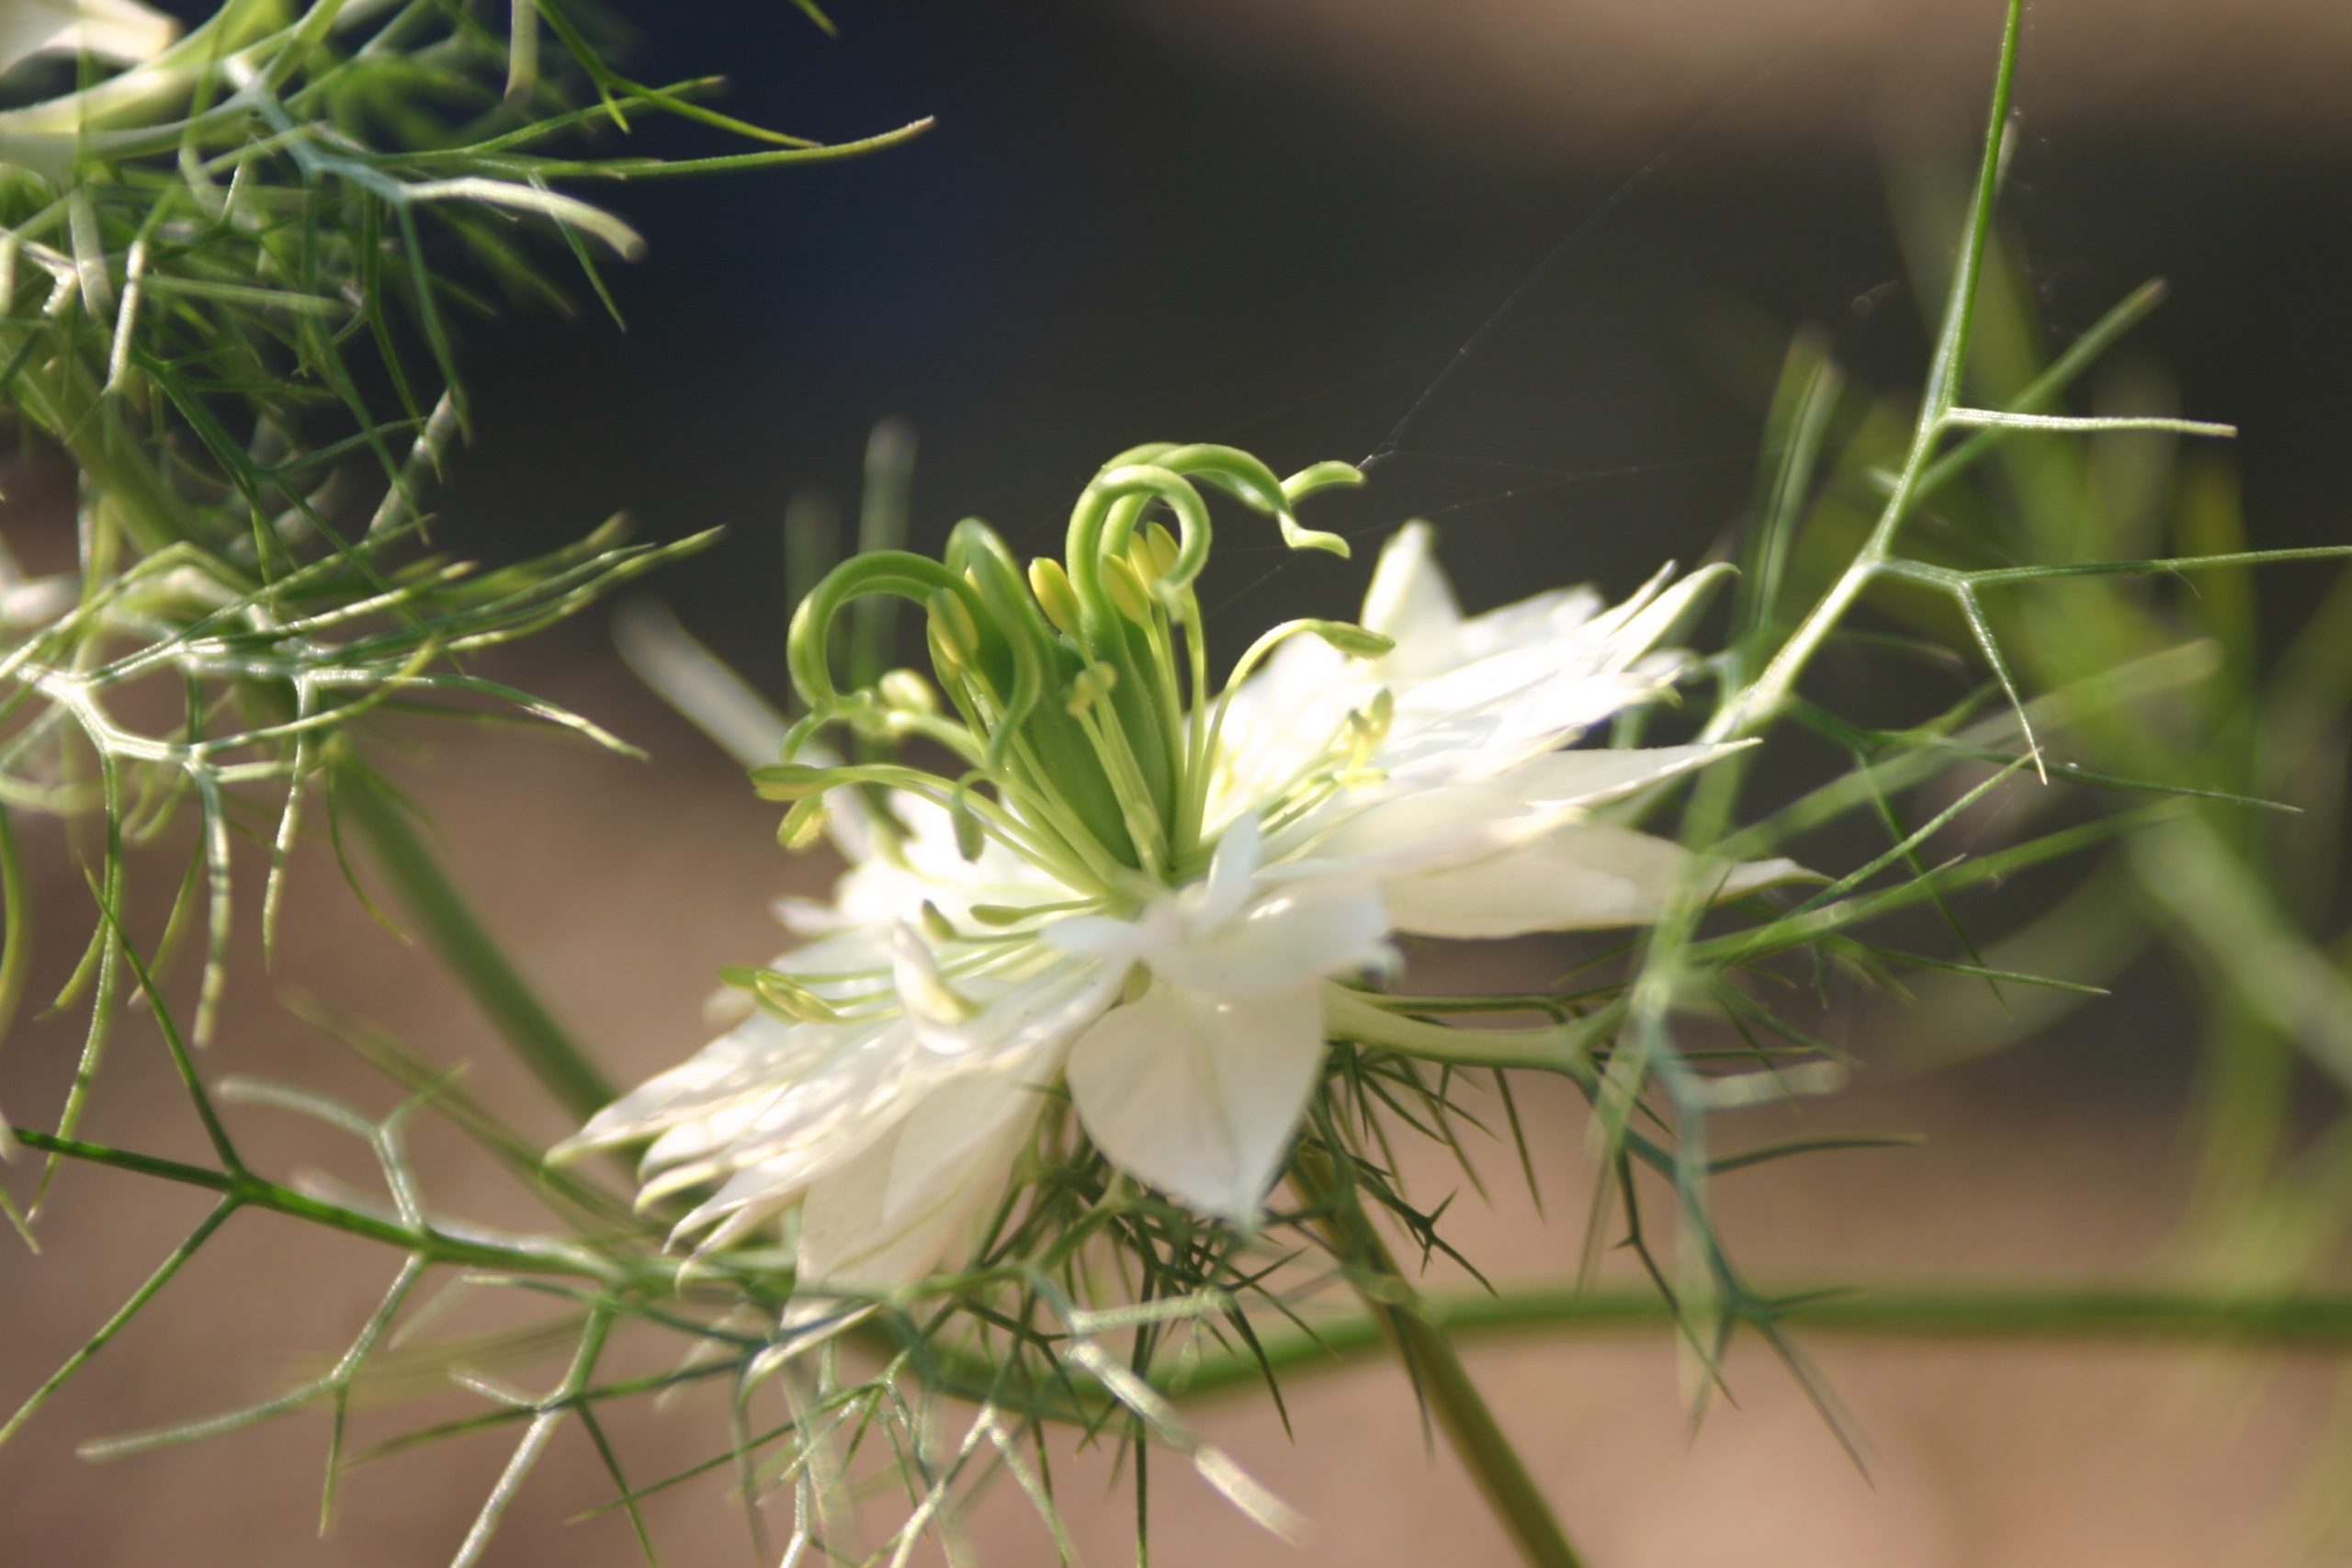
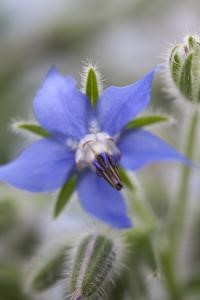
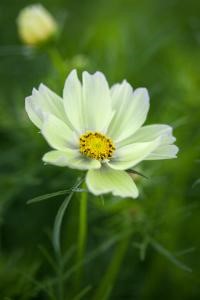
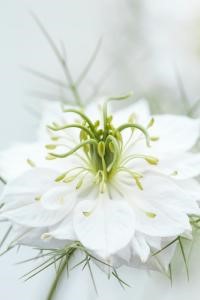
Sunshine and Showers: Borage, Nigella ‘Albion Green Pod’ and Cosmos ‘Xanthe’
In this scheme, Borage provides airy blue, Nigella provides white clouds, and the sunshine comes from Cosmos ‘Xanthe’. This combination gives us a fantastic range of flower-forms. The delicate little star-shaped flowers of borage are held in feathery clusters. The flowers are edible, and look wonderful scattered on a salad or a cupcake. Cosmos are like silky daisies, with pleated petals. Nigella flowers resemble rather fantastic aliens, with the green stamens curling into tendrils, hovering above the white flower. If you don’t cut them in time, they form incredible balloon-like seedpods, which are equally decorative in a vase.

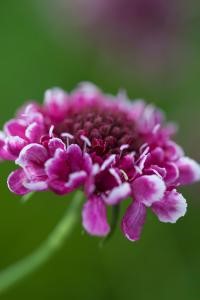
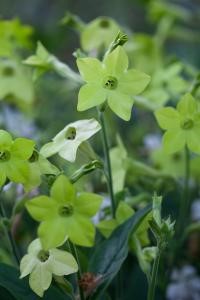
Summer Berries with a Twist of Lime: Scabious ‘Beaujolais Bonnets’, Cosmos ‘Double Click Cranberries’ and Nicotiana ‘Lime Green’
My second colour scheme is fruity and zingy. The luscious, berry tones come from the Cosmos and Scabious (don’t be fooled by the ugly name), whilst Nicotiana brings a burst of citrus. Scabious is also known as ‘pincushion flower’ which very accurately describes its pretty fuzz of petals and anthers which stick out in all directions. It is a bee magnet. This Cosmos has a double row of petals, which have a silvery sheen on the reverse of the magenta petals, giving it a shot-silk metallic sheen. The petals flutter beautifully in the breeze. Nicotiana flowers hang down in elongated bells, and are attractive to moths. They give a delicious scent in the evening.

Sowing Seeds
You will need:
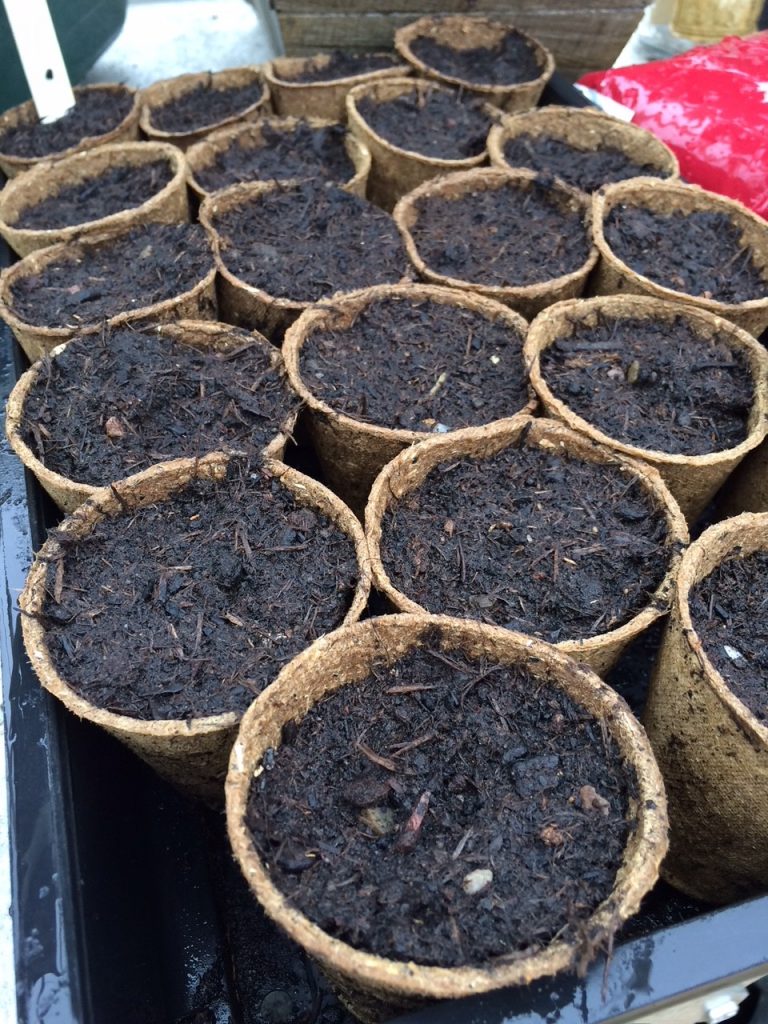
- Seed trays or fibre pots
- Multi-purpose compost
- Packets of seed
- Water
How to get started:
- Fill your seed trays or fibre pots with compost and press it down a little bit to make an even surface. Water it to just dampen the surface of the compost.
- Now write some labels for your seed trays! A lollipop stick is fine, or you can make a little paper flag with a cocktail stick if you are feeling creative.
- Sprinkle your seeds on top of the compost. If they are large enough to handle, then space them out. If you have lots of seeds, you can keep some for next year: most seeds will keep for a couple of years, so long as you keep them in a cool, dry place. In a tin is perfect.
- You can then just add a sprinkle of compost on top of your seeds, rather like you would sieve icing sugar onto a cake. And yes, some gardeners do sieve their compost. But if you are new to this, don’t worry, it is not essential, so long as there aren’t big lumps sitting on your tiny seeds they should be fine.
- Water your seeds very lightly.
- Your seeds will need to be at around room temperature to germinate. On a windowsill in the house is perfect.
Tips
- Keep them hydrated, but don’t drown them!
I check on my seed trays once a day, and give them a light sprinkling of water. They will germinate in 7-14 days. You will worry in the meantime that you have done something wrong; that they are not going to germinate. Sit tight. Twiddle your thumbs. Sing to them a little bit. One morning you will see a little curled stem, possibly with a seed-hat stuck to it (don’t worry, it will probably come off, and you can help it in a few days if you really feel the urge). - Once you see little seedlings sprouting (hurray!), you can keep watering from a jug, or you can spritz them with a pump spray. You can recycle a pump spray if you like, but wash it out thoroughly first. Spritz your seedlings a couple of times a day. You’re aiming to refresh them, but you don’t want to drown them. A couple of spritzes per seedling should be perfect.
- Turn your seed-tray or pots once per day. The seedlings will turn towards the window to seek out the sunlight. To ensure even growth you need to turn them.
Thinning, pricking out and pinching out the tips
This sounds mean, but it really isn’t. If you have seedlings growing too closely together, they will not reach their potential. You have to grit your teeth and pull one out. If you can transplant it elsewhere, then do, but if you have plenty of seedlings, don’t worry. Honestly, don’t worry. That is the hardest thing for a novice gardener to do.
The first pair of leaves are seed leaves. Then your seedling will do something magical and grow its first pair of true leaves. These will be completely different. It is like watching a caterpillar become a butterfly. Once your seedling has one to two pairs of true leaves, you can prick them out. This just means transplanting them into a little pot of their own. They are moving from the crib to their own bedroom.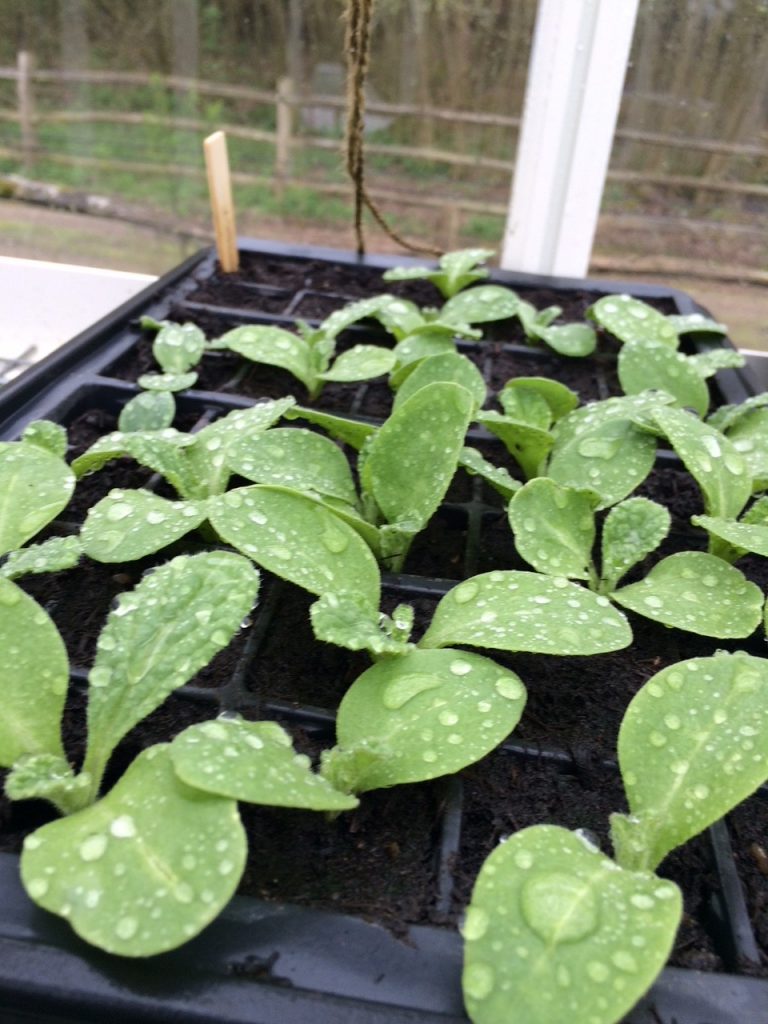
To prick out:
- First have some small pots to hand. Fibre pots are great because they can be planted directly into the soil or a larger container later on.
- Half-fill your pots with multi-purpose compost.
- Here’s the slightly ticklish bit. Use a pencil to lever out each seedling from under their roots. Hold on to a leaf. Transplant the little seedling, roots and all, into the new pot. Don’t hold the stem: better to lose a leaf than a stem. It’s the same for a human. You can lose a limb, but not your trunk.
- Gently ease the seedling into position in its pot, as central as possible, and sprinkle compost in around it to fill the pot.
- Press down with your finger tips to make sure it is snuggly.
- Give it a nice comforting drink.
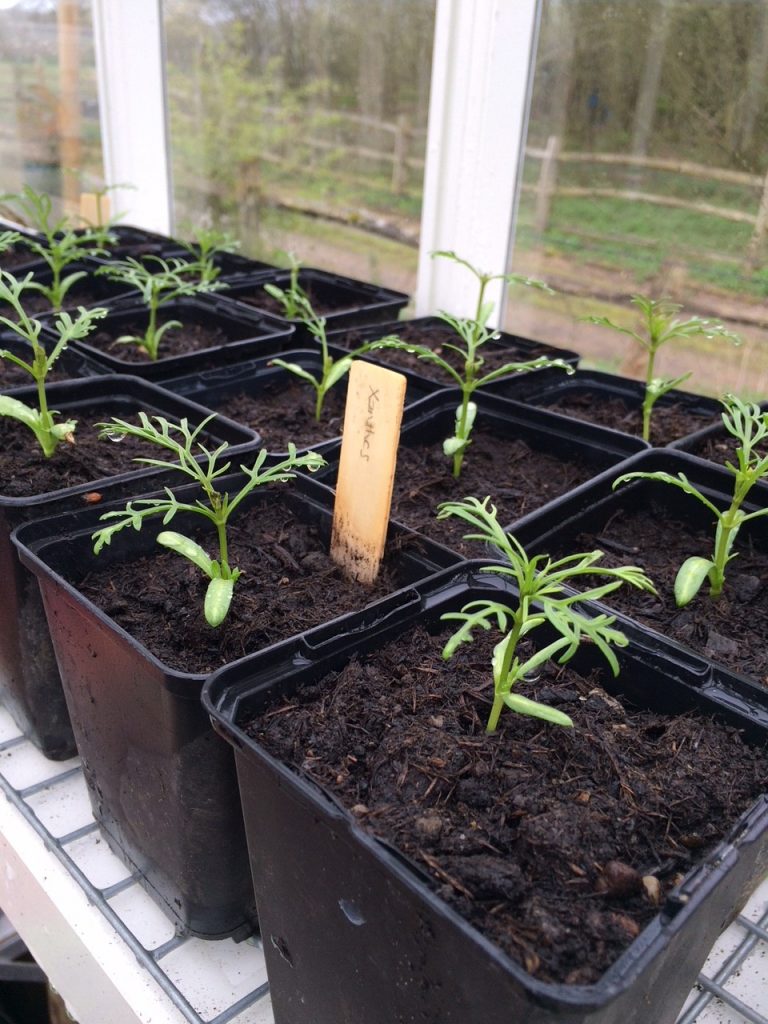
Let your seedlings recover from this shock for a week or so. Once they have started growing again, you need to think about pinching out the tips.
Seedlings will grow tall and gangly unless we pinch out the growing tip. That means literally pinching out the top two leaves once there are a couple of pairs of leaves. This too is hard to do, because by now your seedlings will be looking really pretty. They will look utterly perfect, and you will coo over them and stroke them, and show all your friends.
Now speak firmly to yourself. You must pinch out the top pair of leaves. The seedling will not scream. It will say “thank you. Thank you. By pinching out this top pair of leaves, you are allowing me to grow side-shoots and branch out. I will grow plump and bountiful, and produce flowers galore. Thank you. You are a true gardener now and I salute you.”
Now do it.
Hardening off
Keep watering daily, turning your seedlings, and stroking, and singing, and showing all your friends. They will be growing away nicely, and have a nice bushy crop of leaves. You can start to think about hardening them off now. Young plants grown indoors are a little bit mollycoddled. To be blunt, they are lily-livered namby-pambies, and you can’t get through secondary school like that. You need to be hardened off.
This means choosing a nice mild day, not too much rain and not too much wind, to place your little babies outside. Just for the daytime: they’re not ready to stay out late yet. It is a bit of a rigmarole, carting them all outside every morning and bringing them inside every evening. But this way you will have tip-top super-plants, ready for anything nature can throw at them.
Do this for a week. Then they are ready for a sleepover. Outside. Make sure that there are no frosts forecast. This means checking your weather app. As long as the minimum temperature stays above 5 degrees, your plants will be fine. If it’s going to go below this, it’s best to bring the plants inside for the night. If temperatures stay above 5 degrees, leave them outside all the time for another whole week.
Planting Out
So you’ve sown your seeds. You’ve thinned them out, pricked them out, pinched them out, chucked them out overnight for a week. Now you can plant them into their final positions. They are flying the nest. This should be after all risk of a late frost is over. The first week of June is generally safe for the South of England, a couple of weeks later for the North.
Prepare your pots, container, wellies, tyre or old bathtub by filling it with multi-purpose compost. I say fill it, but leave enough space for your plants. They will be filling their little pots nicely now, and ideally you will see roots poking out of the bottom of the pots. If you have used fibre pots, you can plonk the whole thing into your container. If you’ve used plastic pots, tease them out.
Space your plants so that they have room to at least double in size. You probably have too many plants now. Give a few away to friends, and preen a bit as they praise your efforts.
Water your plants in really well. A general rule for watering plants in pots is to give them a really good soak once a week, rather than a daily sprinkle. A light sprinkle will encourage the roots up to the surface, whereas a good soak encourages the roots down and out. In warm, dry weather you will want to up your watering, and the smaller the pot, the more frequently you will need to water.
I feed my plants in pots once a week with dilute liquid seaweed, available from all good garden centres. I say dilute. Don’t be tempted to up the dose. If plants get too many nutrients, they will produce lots of leaves but no more flowers. Or the nutrients will just get washed away into the ground and water courses, and this is no good for wildlife. Better to mix liquid seaweed that is too weak than too strong.
Harvesting!
Finally! The fun bit! Well actually, it’s all been pretty good fun, hasn’t it? I find nothing more satisfying and morally edifying than all of this poking around and marvelling at the wonder of nature. Remember those dry old seeds you sprinkled a few weeks ago? Look at them now! They’ve made roots, and leaves, and flower-buds! You might even have your first flowers now!
Don’t be afraid of harvesting your flowers. Annual plants produce masses of flowers. The more you pick, the more they produce. Cut the stem nice and long so that you can arrange it in a jam jar or a jug. Strip off the lower leaves. Flowers are best cut early in the morning, and just as the petals are opening. Arrange in any way that pleases you. You can stick to my ‘sunshine and showers’ or ‘summer berries’ colour themes, or you can mix-and-match. No two bouquets are ever the same. Single stems in a series of glass bottles look fabulous. Tie a ribbon around a bunch and give them to a friend or neighbour. Fill your boots.
Make sure you keep on cutting. If you leave the flowers on the plant then make sure that you dead-head the spent blooms. The plant will put all of its energy into setting seed (producing seed pods) if you leave them and will stop producing flowers. Keep on cutting and these plants will produce non-stop flowers from June through to the first frosts in November.
Borage, Cosmos bipinatus ‘Xanthe’ and Nigella damascena ‘Albion Green Pod’
Cosmos bipinatus ‘Double Click Cranberries’, Scabious atropurpurea ‘Beaujolais Bonnets’ and Nicotiana alata ‘Lime Green’

All these varieties are available to buy from Chiltern Seeds
I really hope you give this a go. These seeds are perfect for children to grow. Or grandparents. If you can’t get out and about or don’t have a garden, they can be grown in a tight space. Just make sure they get direct sunlight for half of the day.
If you or anyone you know has been feeling blue, then gardening is a brilliant way to see the point of life again. Plants require so little from us: a bit of compost, a bit of water, some sun. They reward our efforts richly, with a cornucopia of sensory delights. Gardening is a really easy way of practising mindfulness.
If you’d like more ideas, inspiration or advice, then visit my blog. Follow Ali, The Mindful Gardener @BattyeAlison on twitter or Instagram.
I have never learnt so much about gardening in one blog post! This post is complete from start to finish with great tips and helpful hints. The flowers are beautiful and photography is gorgeous. Now is the perfect time so I will definitely be trying this out. Thank you so much Alison. – Sarah (editor of Hobbyism)
Share your hobby to be featured on the website.